In order to use EFIS 2.0 without issues, a setup process must be followed. This document outlines the steps required to properly setup and access EFIS 2.0.
This document has information about the following:
- System requirements
- Browser setup
- Setting up Smart View
For further technical support: efis.support@ontario.ca
1 System Requirements
1.1 Software Requirements
| Client OS | Browsers |
|---|---|
| Windows 10 |
MS Edge Firefox ESR Chrome |
| Windows 11 |
MS Edge Firefox Firefox ESR Chrome |
| Apple Mac OS X v10.6.8 - macOS Ventura v13.2 |
Firefox Firefox ESR Chrome |
*Internet Explorer is no longer supported and should not be used.
| Vendor | Version | Additional Info |
|---|---|---|
| Microsoft |
|
|
| Oracle |
Smart View (v. 24.200+) |
|
1.2 Bookmarking the EFIS URL
When bookmarking the URL, please ensure that you bookmark the page after logging into EFIS or the EFIS Portal, as you otherwise may be presented with an error. The following URLs should be bookmarked:
EFIS EPM: https://efis.fma.csc.gov.on.ca/workspace/index.jsp
EFIS Portal: https://efis.fma.csc.gov.on.ca/apex/f?p=600:HOME_PAGE
With the wrong URL bookmarked, these are a few of the few errors you may receive:

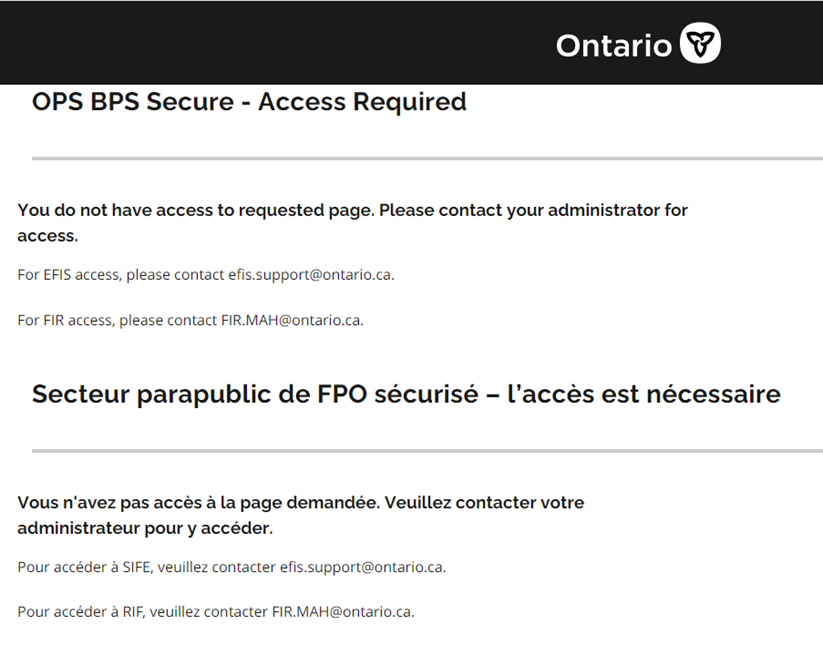
1.3 Pop-up Blockers
Sometimes when signing into the EFIS application, the page does not redirect to the application, and instead a blank screen appears. This is usually due to pop-up blockers. Please refer to the appendices to fix this issue in the browser's settings.
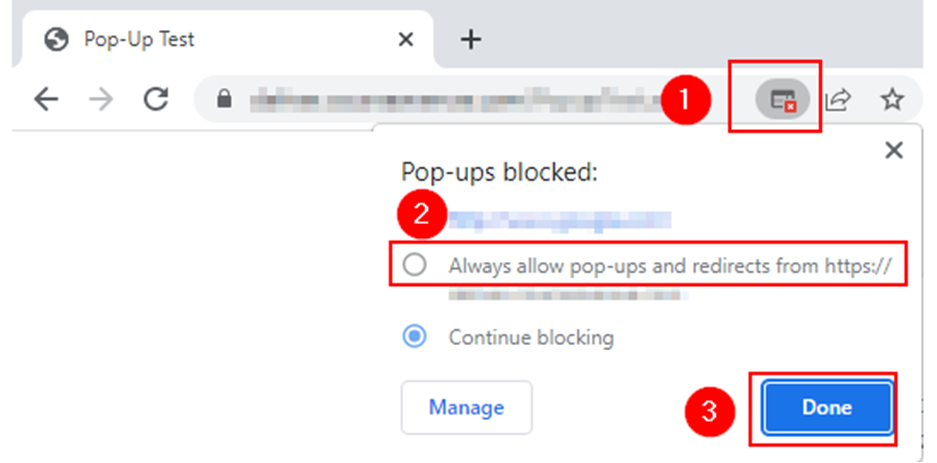
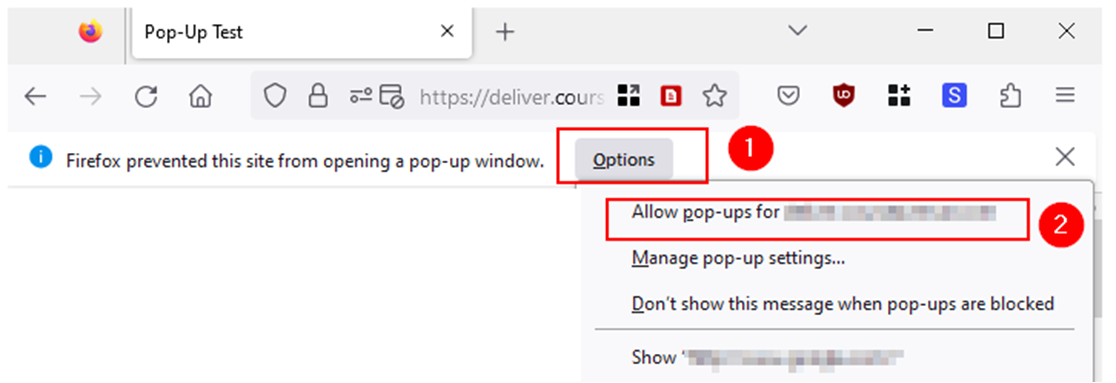
If the icon is there, allow the pop-up by clicking the icon/message. After doing so you may need to restart the browser.
For Microsoft Edge and Chrome:
For Firefox:
2 Smart View
To use the Smart View add-in, you must be using Microsoft Office 2016, 2019, newer versions (i.e. 2021), or Office 365.
You need to have Administrator rights to install Smart View. Please contact your local IT support desk to gain Administrator access.
Please note: If you have an older version of Smart View already installed on your machine, please uninstall this version before proceeding with the installation.
2.1 Installation
There are two methods of installing Smart View.
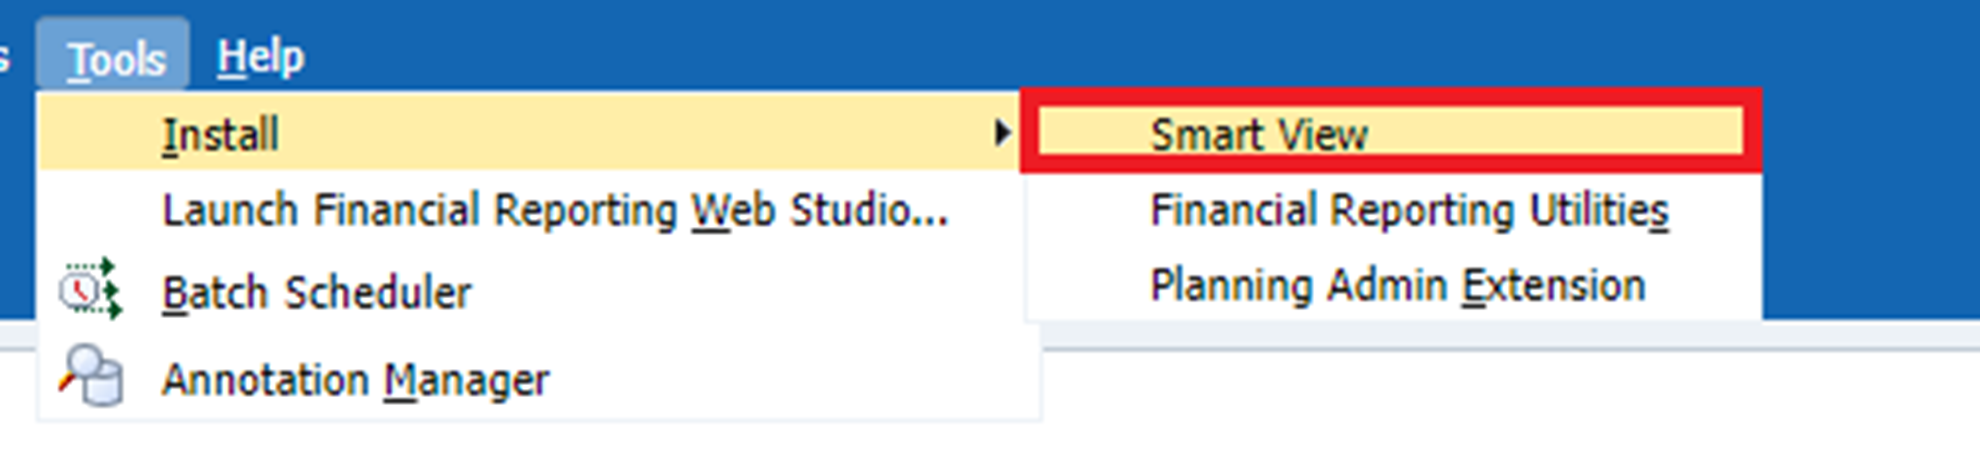
Method 1: From Within EFIS
Access the EFIS application as usual. Once you are signed in, click on Tools -> Install -> Smart View from the menu. The Smart View install file will begin downloading.
After the download has completed, you may open or save/save as the program to install later.
Follow the next steps to complete the installation.
Initiate the Smart View installation by navigating to the folder where you downloaded the file and double clicking the SmartView.exe file. Then click "Run" or right click on the file and select "Run as Administrator".


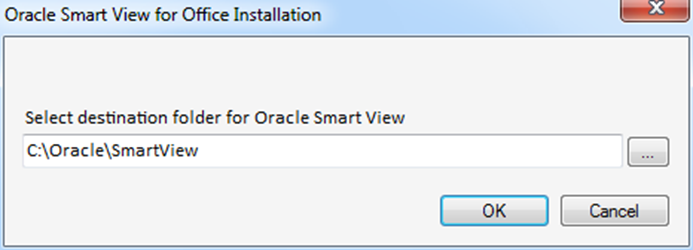
Select your destination folder and click on OK.
Follow the prompts to complete the Smart View installation.
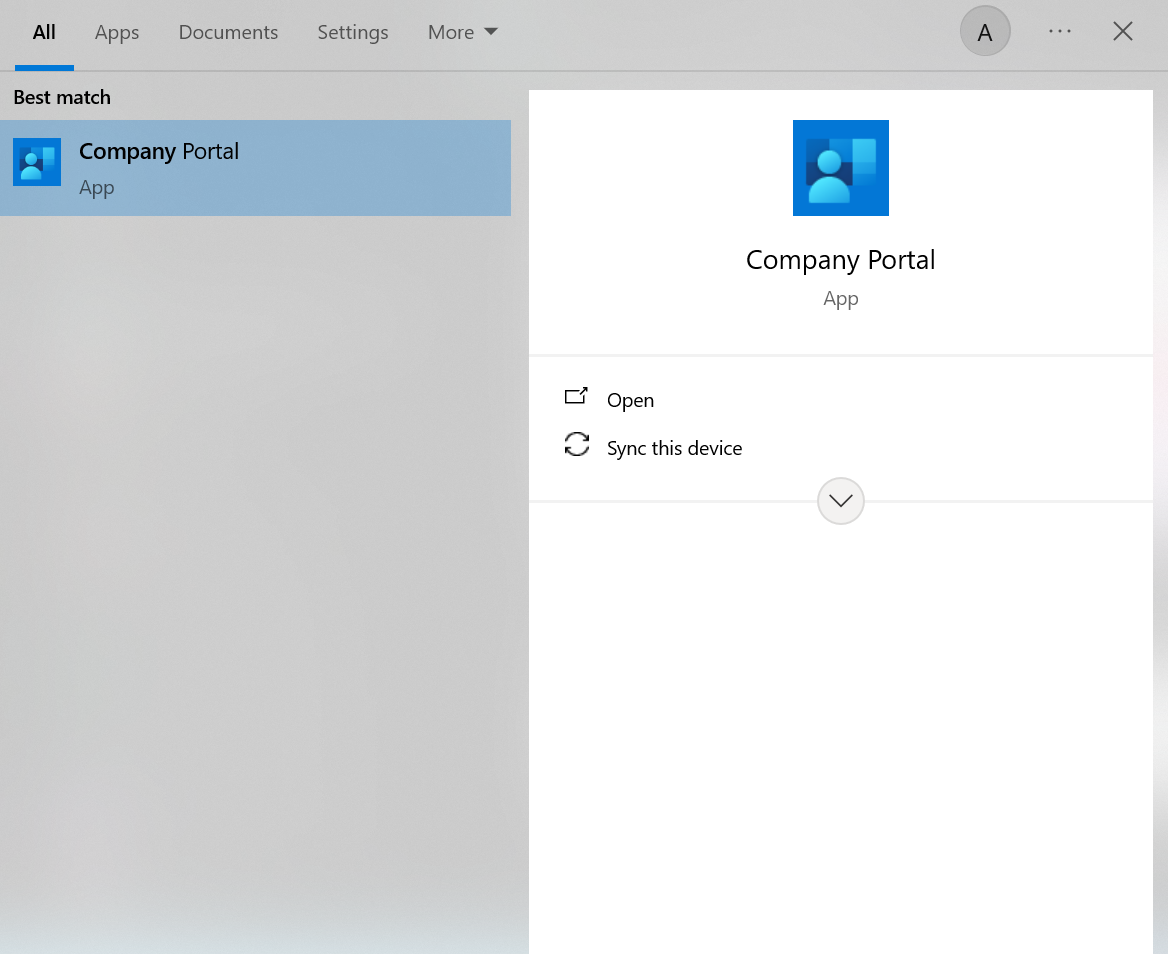
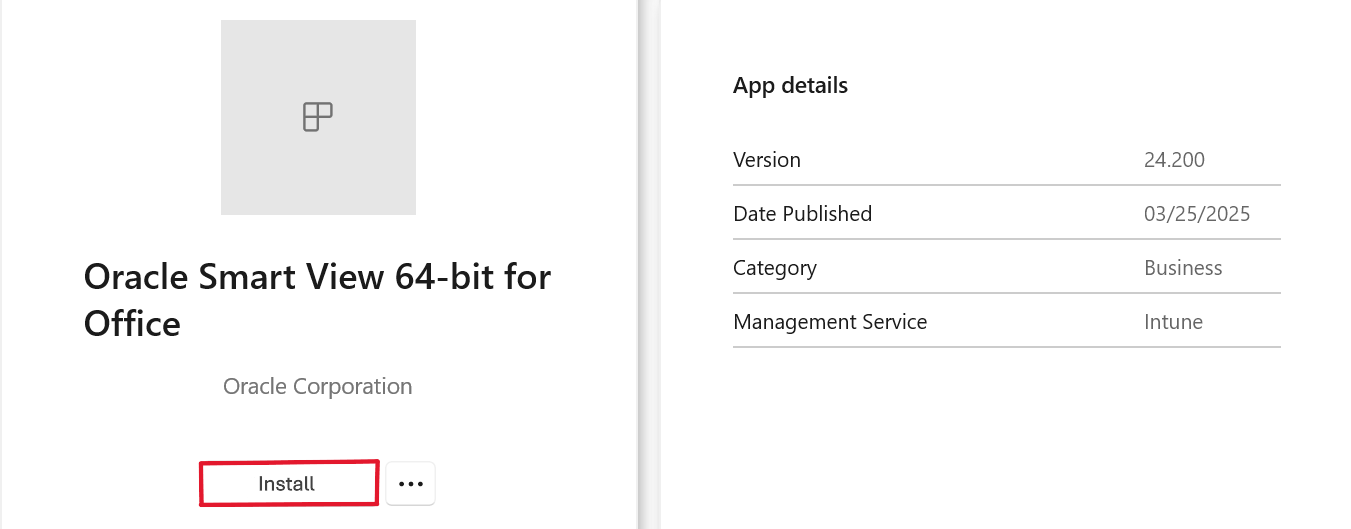
Method 2: For Ministry users only
Install Smart View via Company Portal

2.2 Verify Installation
The next step is to open Excel and check that the Smart View tab is visible in the toolbar.

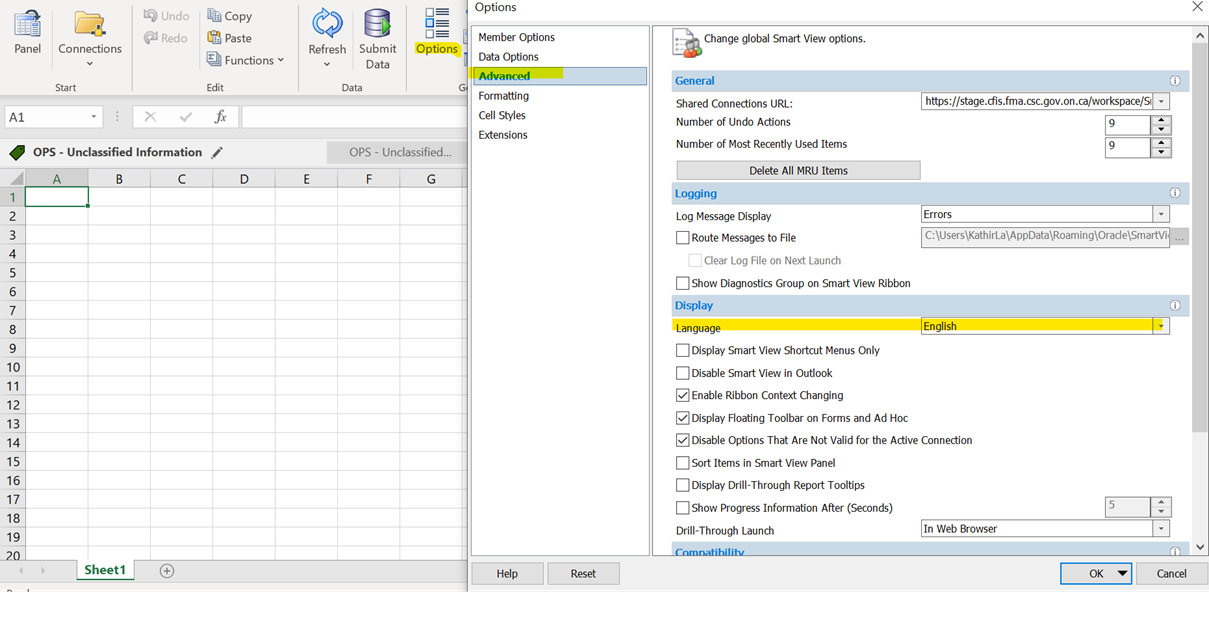
2.3 Language Selection
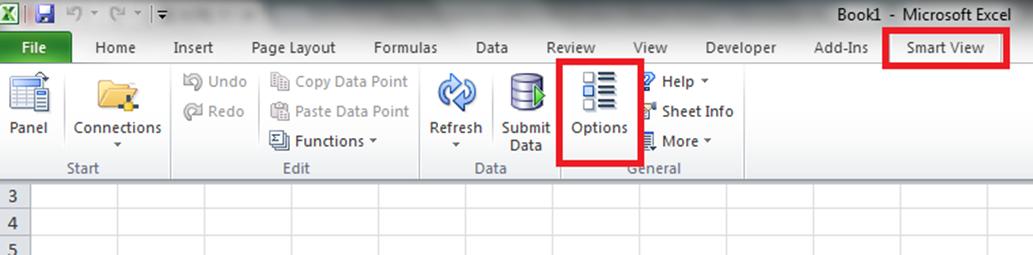
Click Options and a pop-up window should open.
Click Advanced on the left pane. Under Display for the Language setting, select your preferred language from the dropdown.
2.4 Setting up Health Check
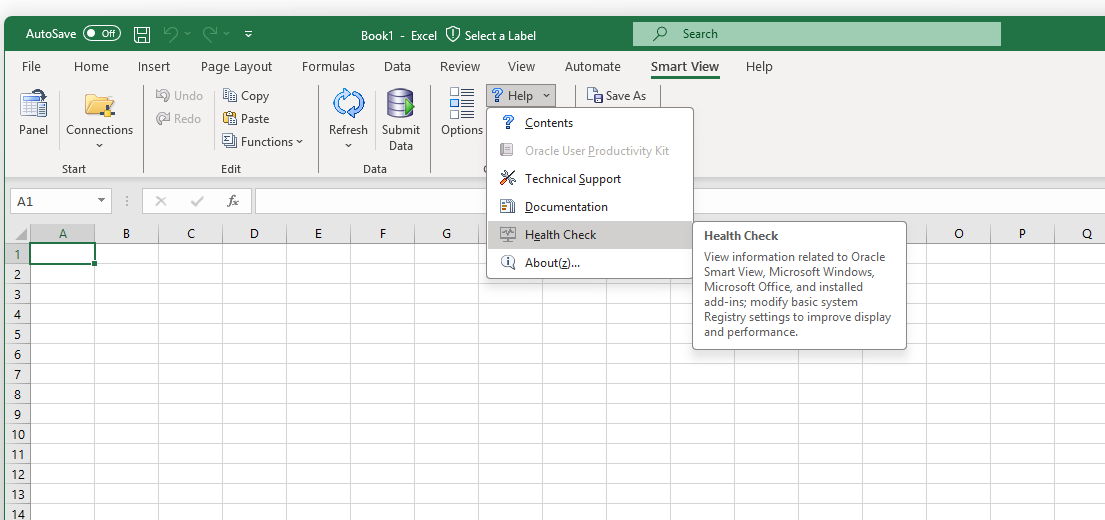
To set up Health Check, click Smart View from the top, go to Help and select Health Check from the dropdown.
Scroll to Smart View Options, and go to WebView2 Runtime. Set to Enable for All and click on Update Settings.
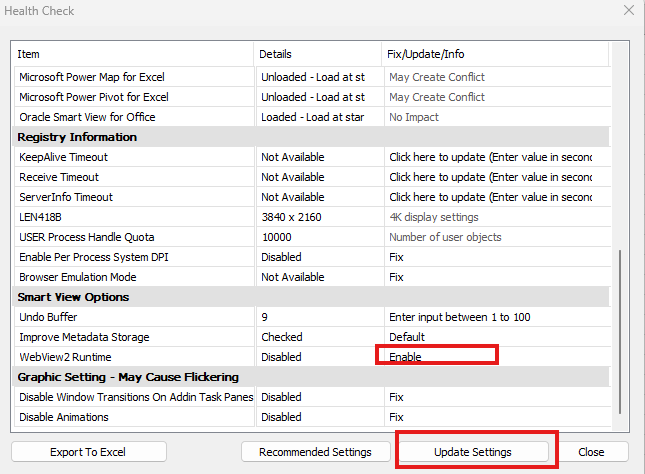
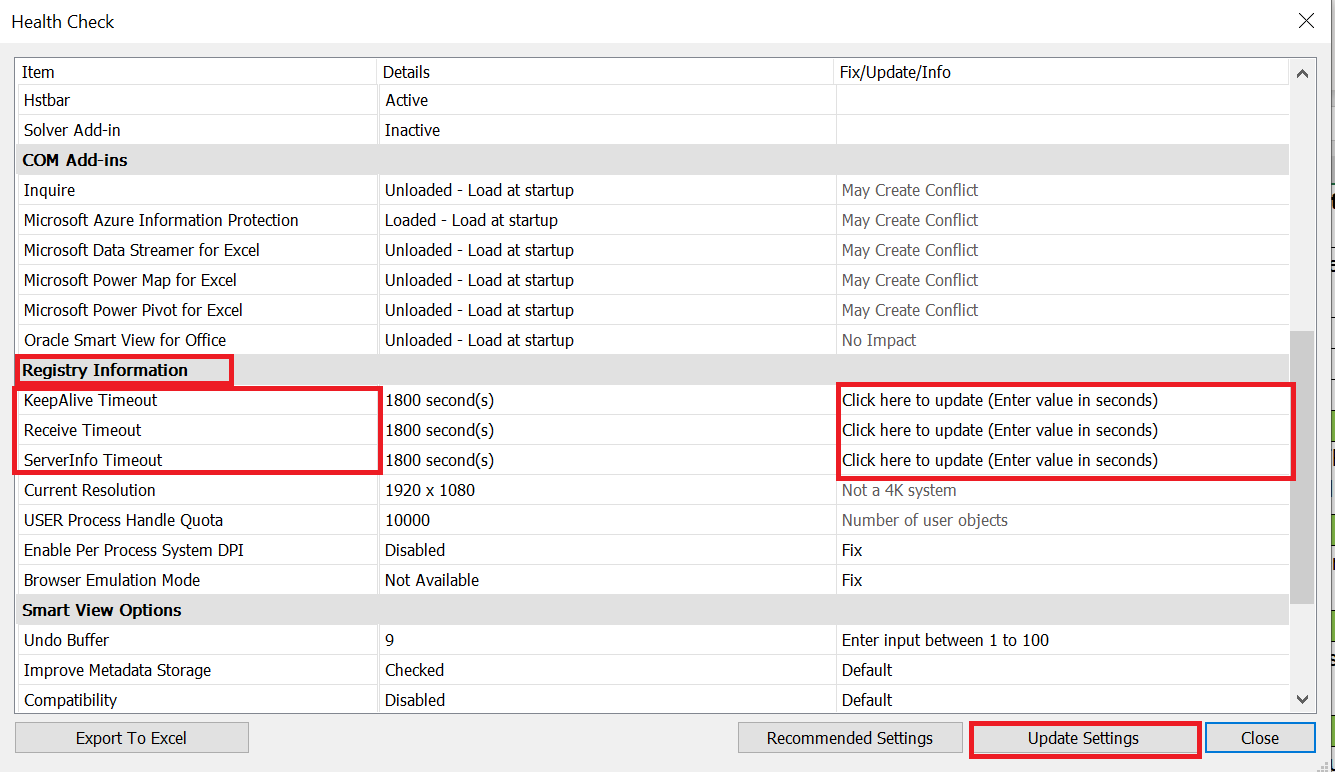
To update the timeout settings, scroll to Registry Information, change the following three values: KeepAlive Timeout, Receive Timeout, & ServerInfor Timeout to 1800 seconds. To change the amount, click in the third, right-most column where it says Click here to update. After entering, press Update Settings to make the changes.
2.5 Setting up Connection
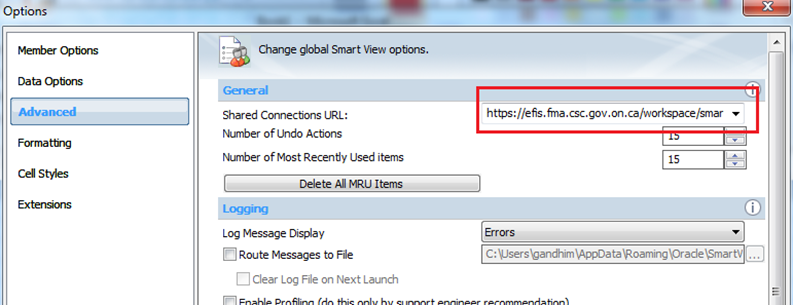
In Smart View, go to Options, click on Advanced and specify the following Shared Connections URL:
https://efis.fma.csc.gov.on.ca/workspace/SmartViewProviders
2.6 Setting up Data Options
Click Smart View -> Options
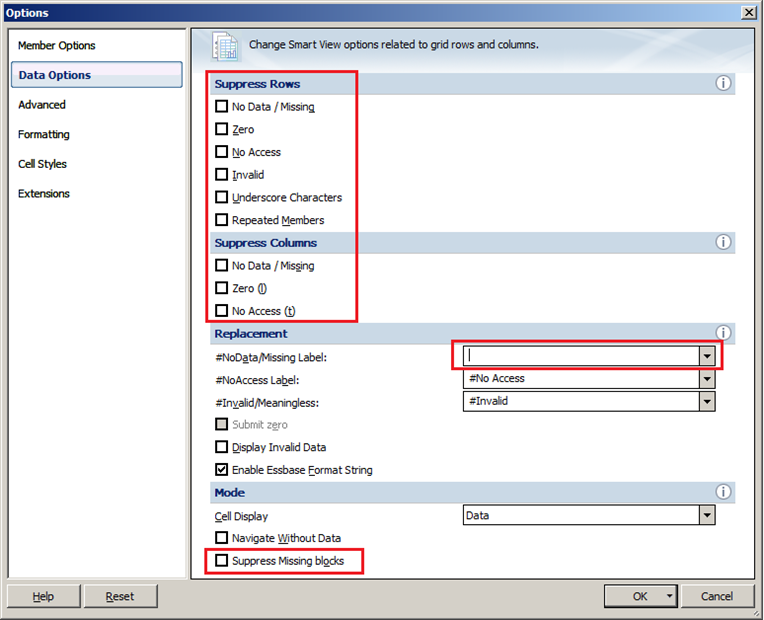
Under the Data Options tab, remove the check marks from the following boxes under Suppress Rows and Columns.
- No Data/Missing
- Zero
- No Access
- Suppress Missing Blocks
Also ensure that under Replacement, the #NoData/Missing Label is blank.
Under the Formatting tab, make sure that Adjust Column Width and Row Height is checked.
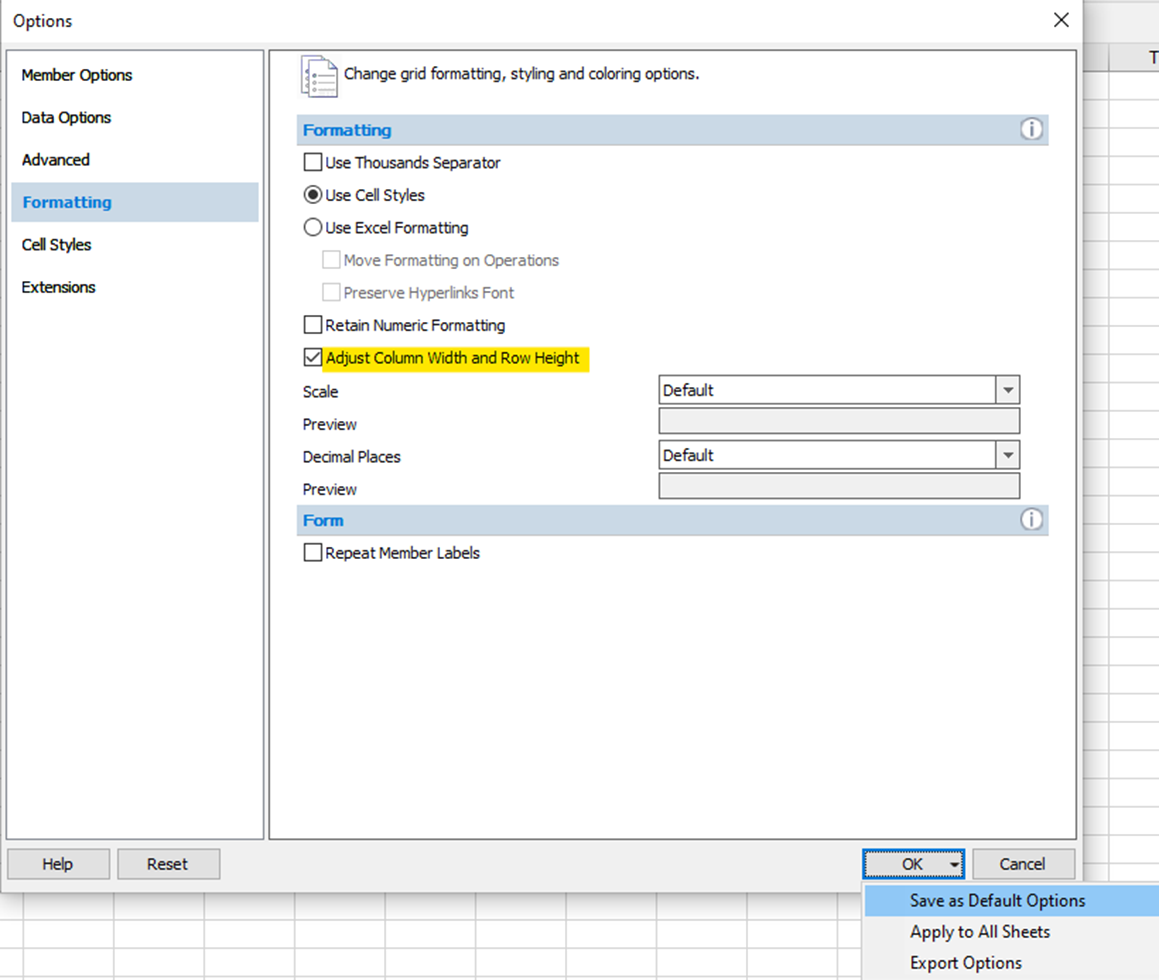
After you make changes, click on the arrow beside OK and select Save as Default Options.
Close Excel and reopen. Check all changes made in Smart View Options were saved.
2.7 Connecting to EFIS System
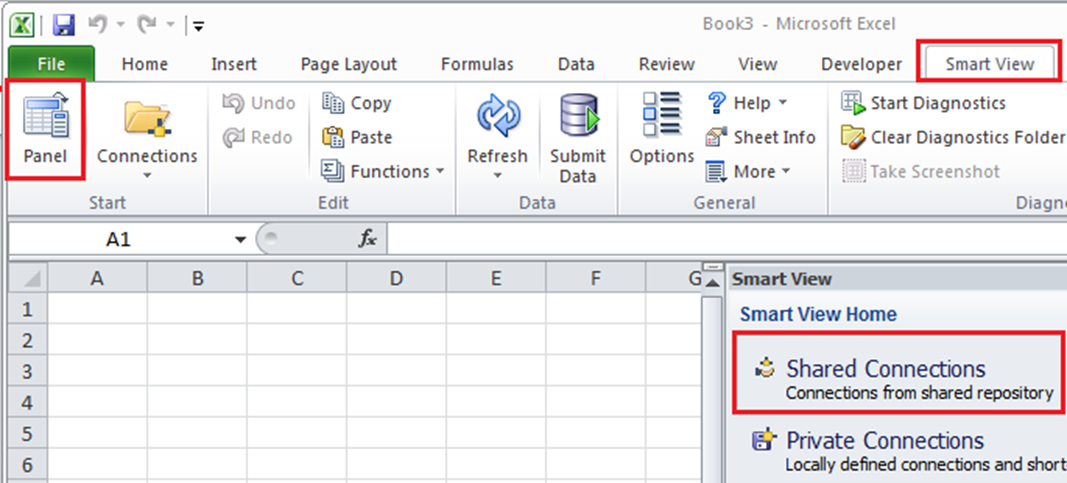
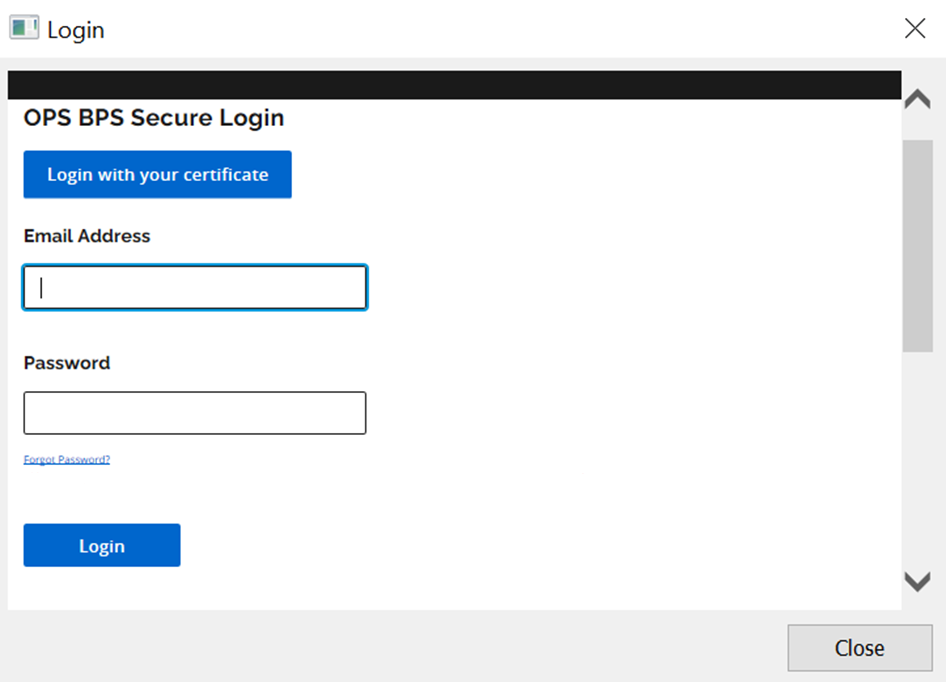
Click on Smart View -> Panel -> Shared Connections
Enter your credentials, and then click on the login button.
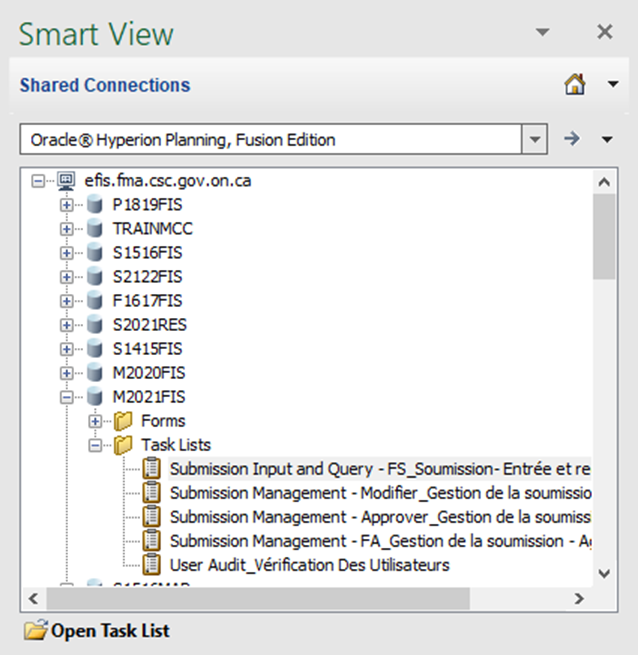
For the dropdown:
- Select Oracle Hyperion Planning, Fusion Edition
- Click on the + sign beside efis.fma.csc.gov.on.ca
- Click on the + sign beside the doc set you will work on
- Click on the + sign beside Task Lists
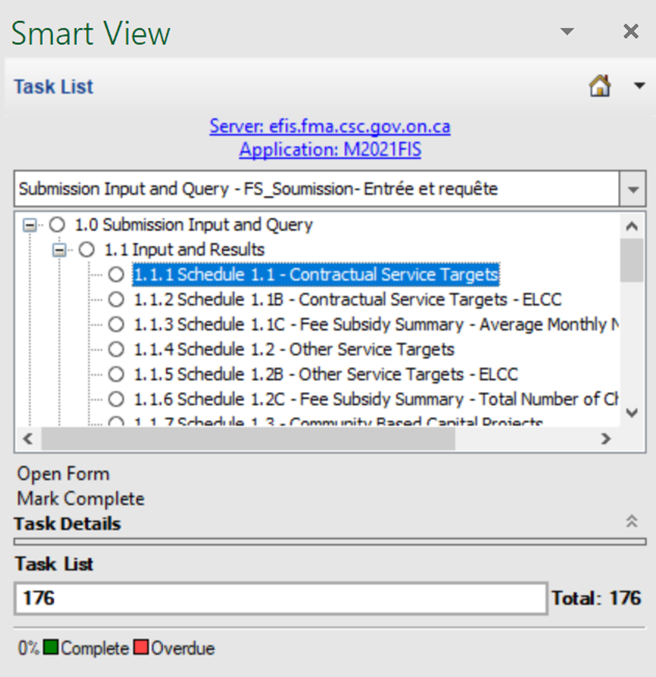
- Double click on the task list that you will input data into
- Double click on the form/schedule that you wish to open
3 Appendices
3.1 Firefox
You may need to have administrator rights to install Firefox on your machine. Please contact your local IT support desk to gain administrator access.
Recommended Version
The latest versions of Firefox or Firefox ESR are the recommended versions for use with Oracle Hyperion planning. Firefox Portable may also work.
Download File
NOTE: You only need to download one of these browsers.
Firefox:
The browser can be downloaded from this URL:
https://www.mozilla.org/en-CA/firefox/windows/Firefox French:
The browser can be downloaded from this URL:
https://www.mozilla.org/fr/firefox/windows/Firefox Extended Support Release (ESR):
The browser can be downloaded from this URL:
https://www.mozilla.org/en-US/firefox/all/#product-desktop-esrFirefox Extended Support Release (ESR) French:
The browser can be downloaded from this URL:
https://www.mozilla.org/fr/firefox/all/#product-desktop-esrMozilla Firefox, Portable Edition
The browser can be downloaded from this URL:
http://portableapps.com/apps/internet/firefox_portableMozilla Firefox ESR, Portable Edition
The browser can be downloaded from this URL:
http://portableapps.com/apps/internet/firefox-portable-esrAt any of those links above, click on Download Now, to save the Firefox installer. Once the Firefox installtaion files are downloaded, double click the file to open it. Follow the prompts to install Firefox.
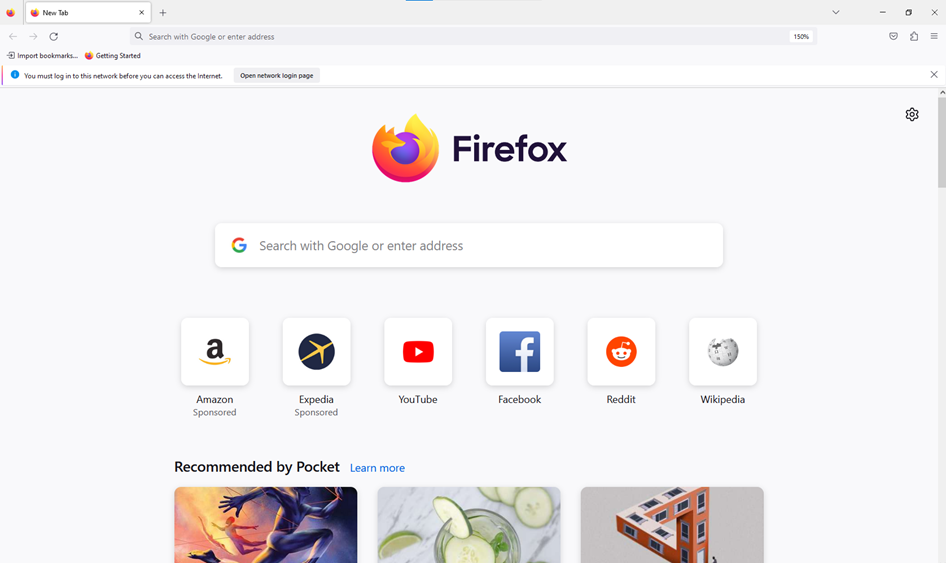
After Firefox has finished installation, open Firefox if it has not launched automatically.
Firefox Settings
Allowing Pop-up Windows
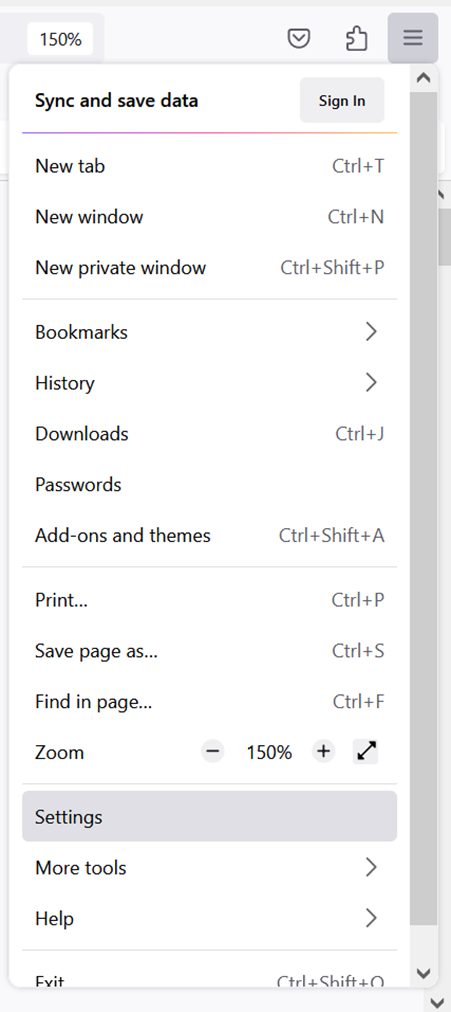
Click on Open Application Menu, which is the three horizontal line icon at the top right of the page. From there, select Settings.
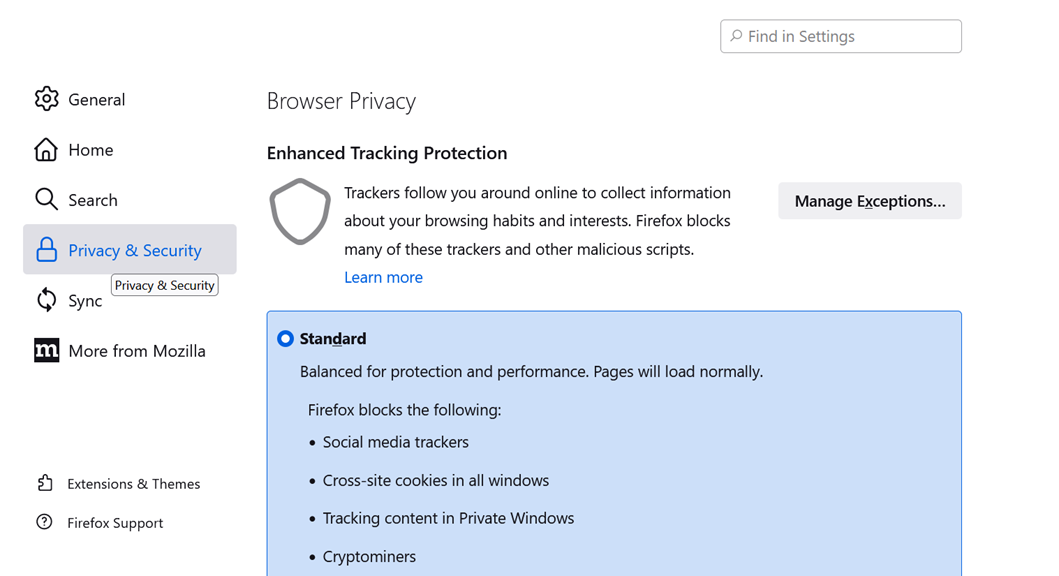
Click on Privacy & Security on the left pane.
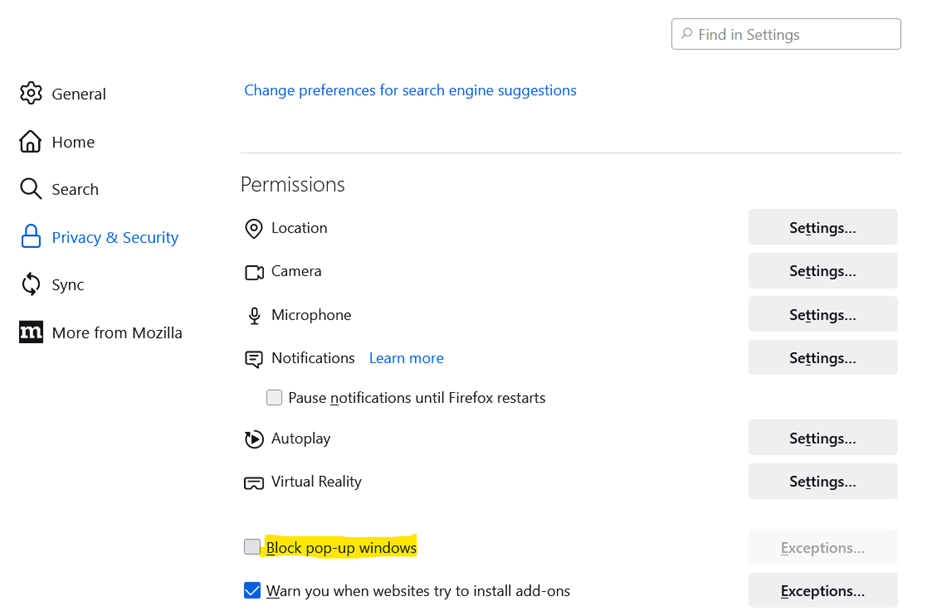
Scroll down to Permissions and uncheck Block pop-up windows.
Block Automatic Firefox Updates and Requests
Click on Open Application Menu, which is the three horizontal line icon at the top right of the page. From there, select Settings.
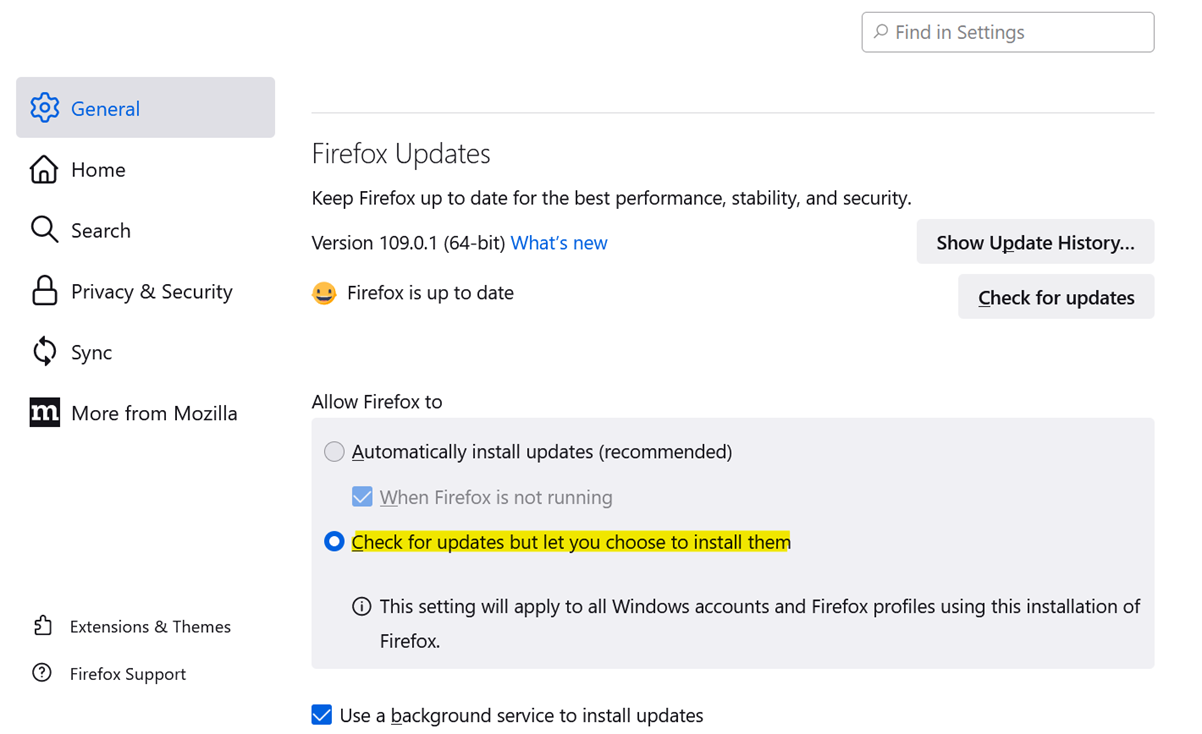
Make sure you are on the General page, and if not click the General tab on the left pane. Then scroll down to Firefox Updates, and click Check for updates but let you choose to install them.
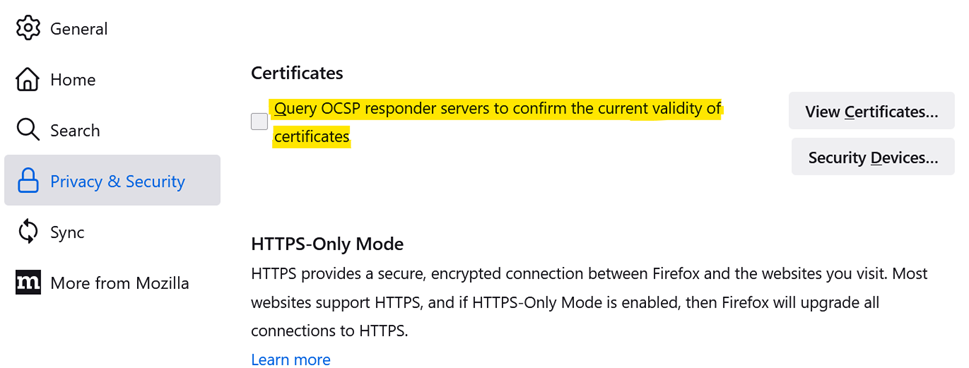
Click Privacy & Security on the left pane. Scroll down to Certificates and uncheck Query OCSP responder servers to confirm the current validity of certificates.
At this point, if you're a Firefox user, your setup for EFIS 2.0 should be complete.
3.2 Microsoft Edge
Recommended Version
The latest version of Microsoft Edge is recommended for use with Oracle Hyperion planning.
The browser can be downloaded from this URL: https://www.microsoft.com/en-us/edge/download?form=MA13FJ
Internet Options Setup
Specific internet options settings are recommended by Oracle for the Hyperion products. Please note that some of these settings may be already applied by Microsoft Edge; however, this setup is still recommended.
Allow Pop-up Windows
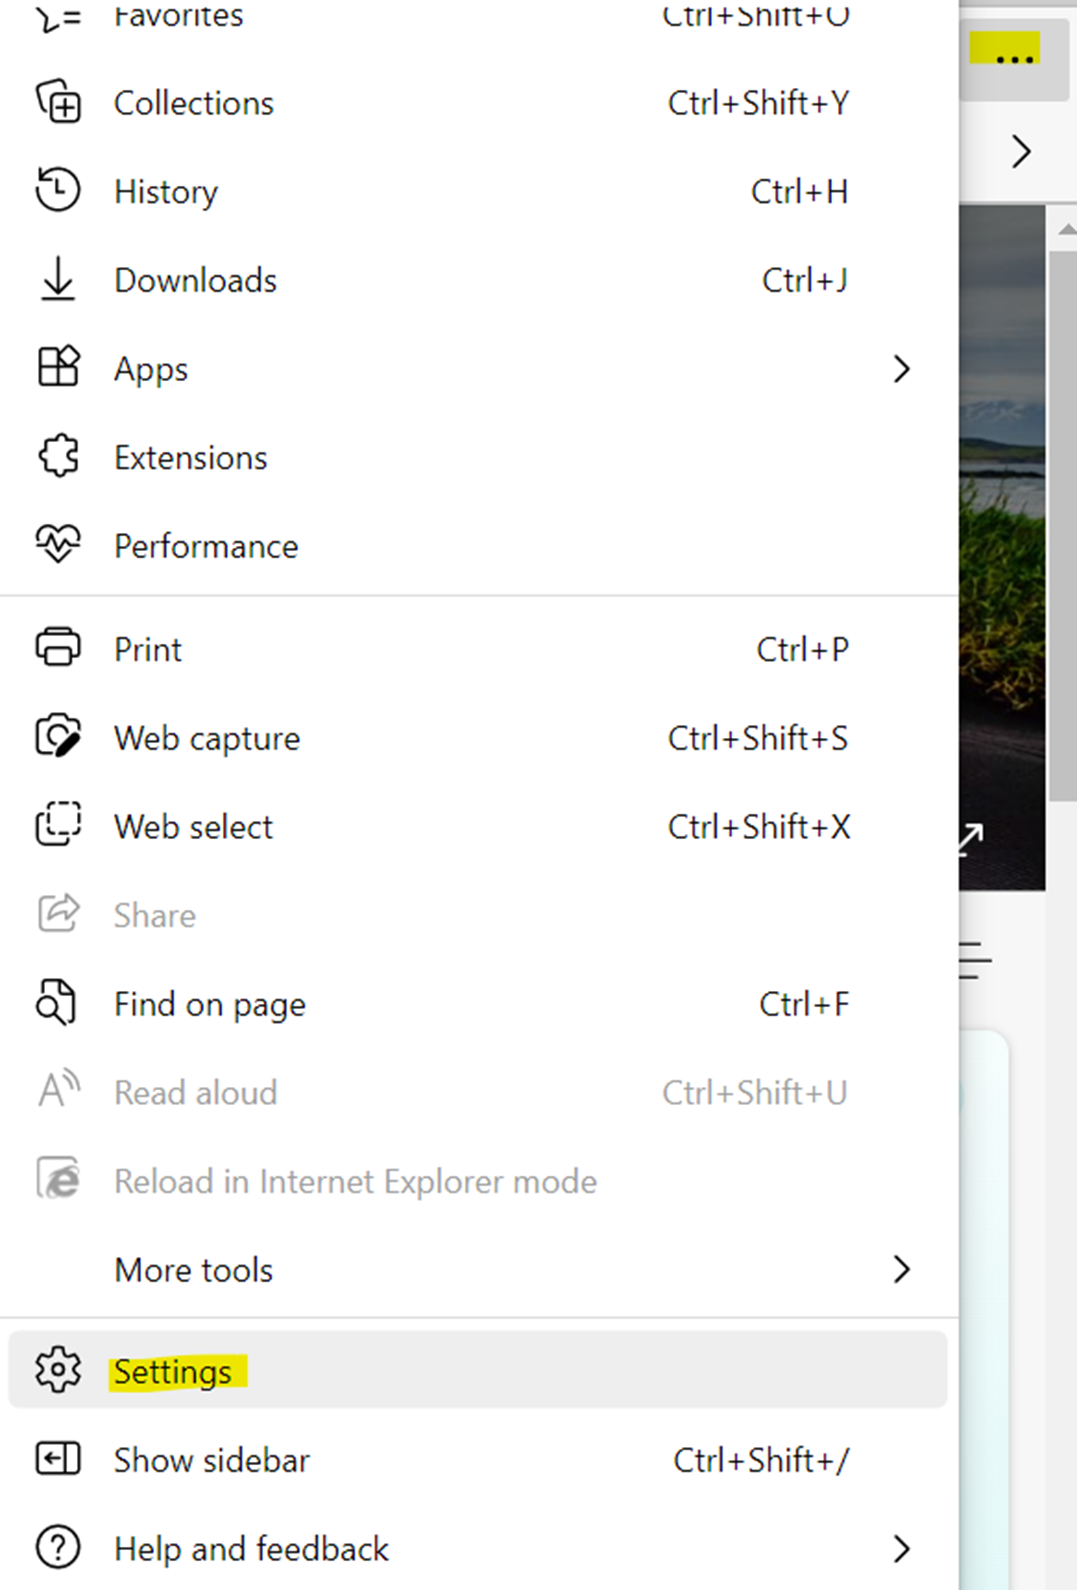
In the Microsoft Edge browser, click on the three dots icon, and then Settings
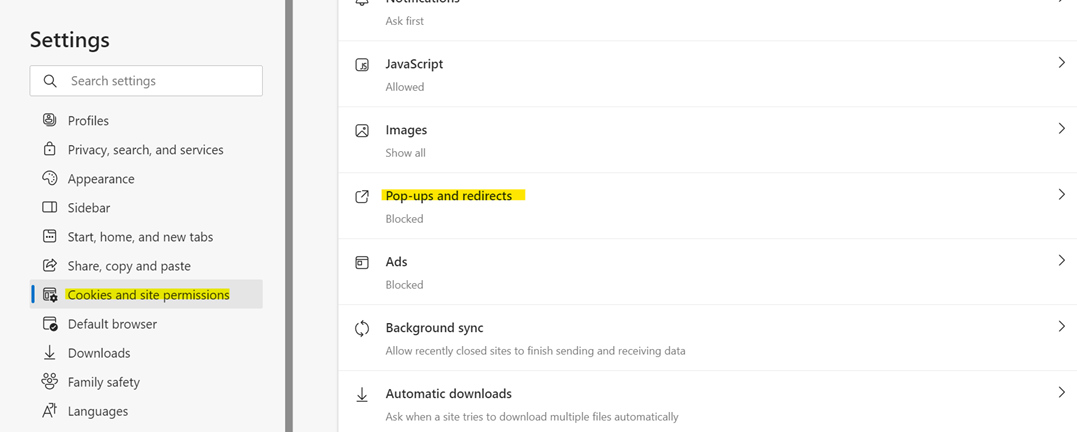
On the pane, click on Cookies and site permissions, then click Pop-ups and redirects
For the Allow option, click Add
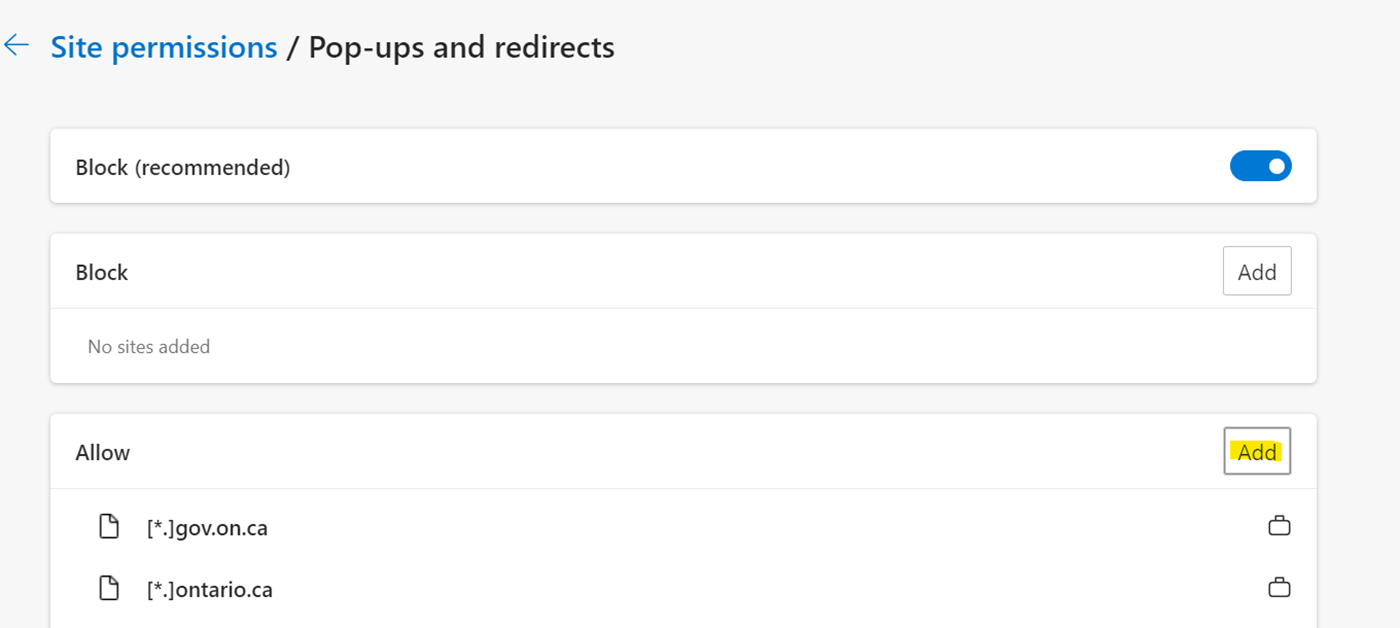
Type in [*.]gov.on.ca and then click Add
![Adding [*.]gov.on.ca in the Allow category](img/imgs-en/setup_guide/edge_redirect_popup.png)
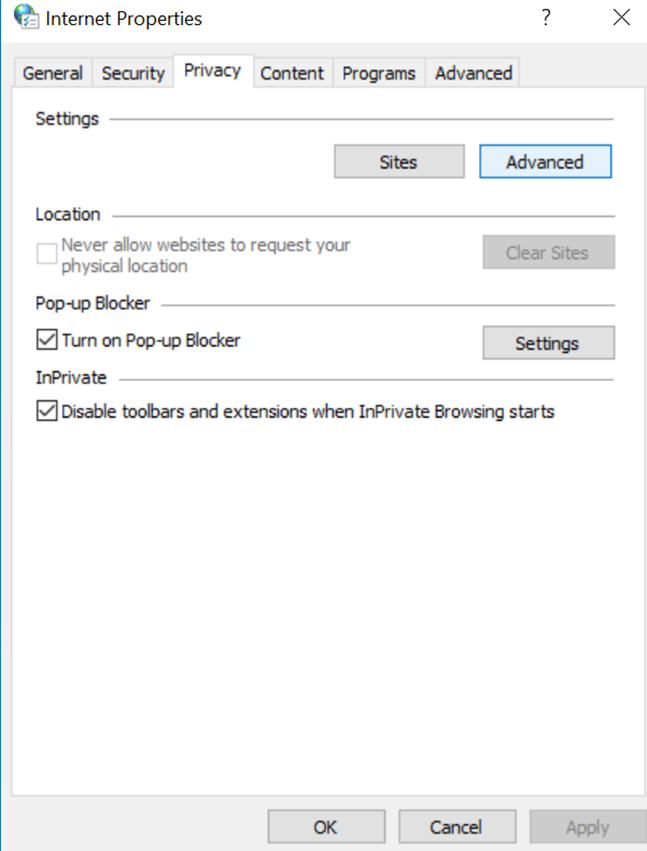
Afterwards, open Internet Properties
Select the Privacy tab, check Turn on Pop-up Blocker, and click on the Settings button next to the Turn on Pop-up Blocker option.

In Address of website to allow, type *gov.on.ca to disable popup blockers for the EFIS Hyperion website. Click Add.
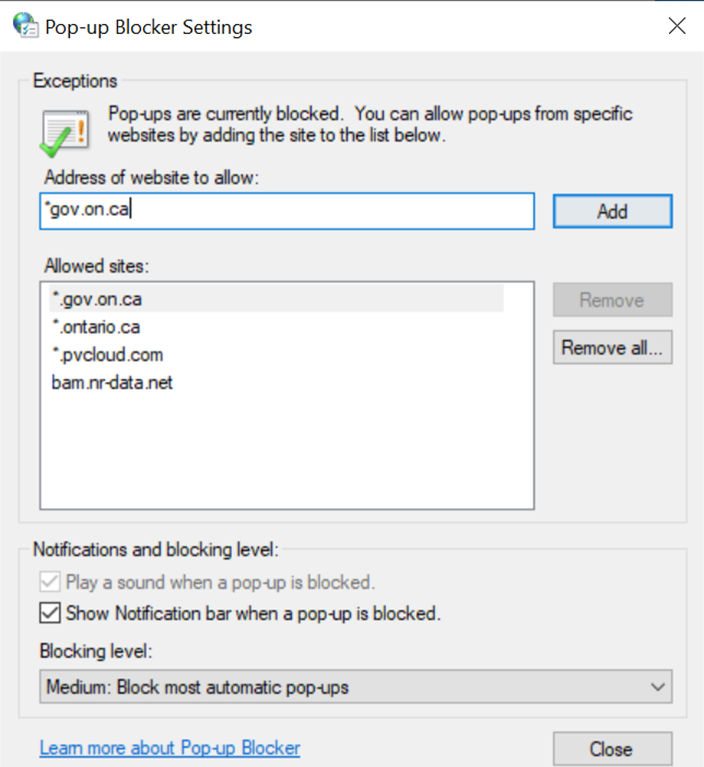
Click Close -> Apply
General Settings
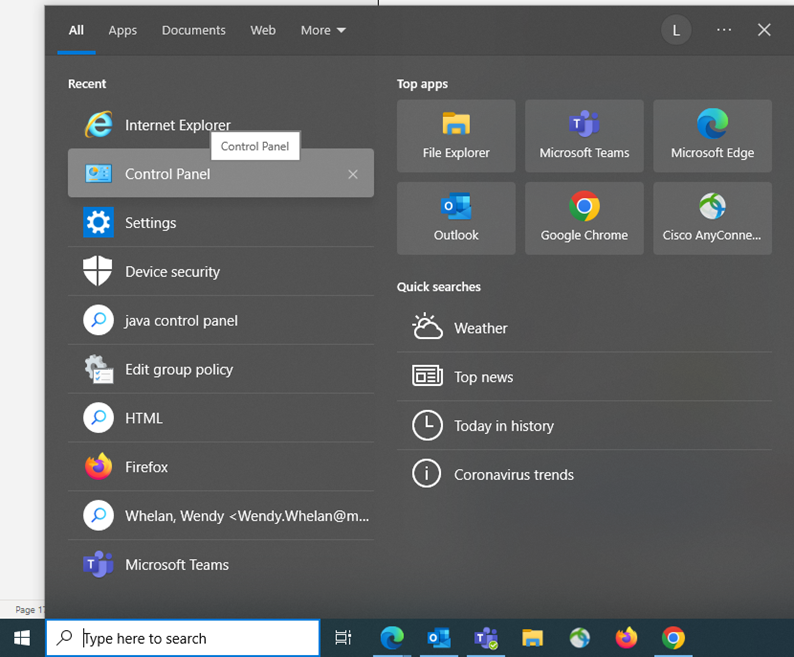
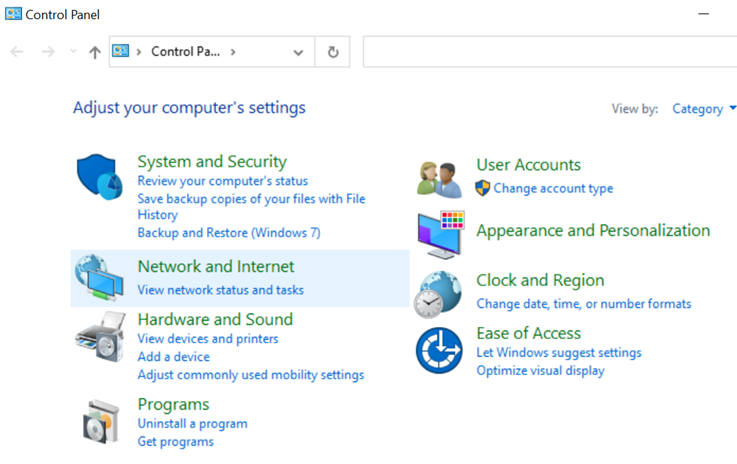
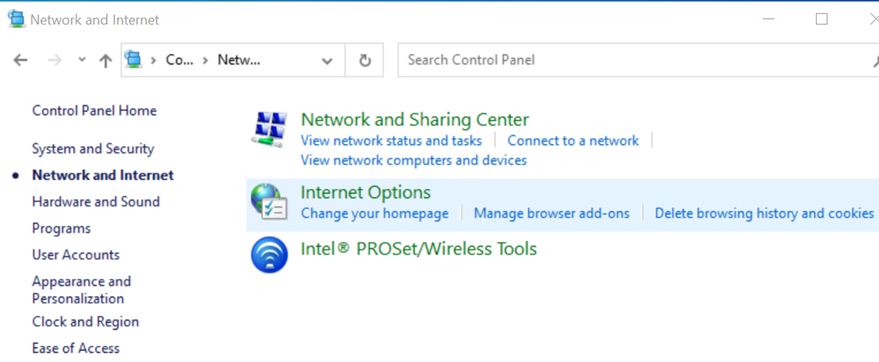
Open the Control Panel on your computer. Click on Network and Internet -> Internet Options -> General
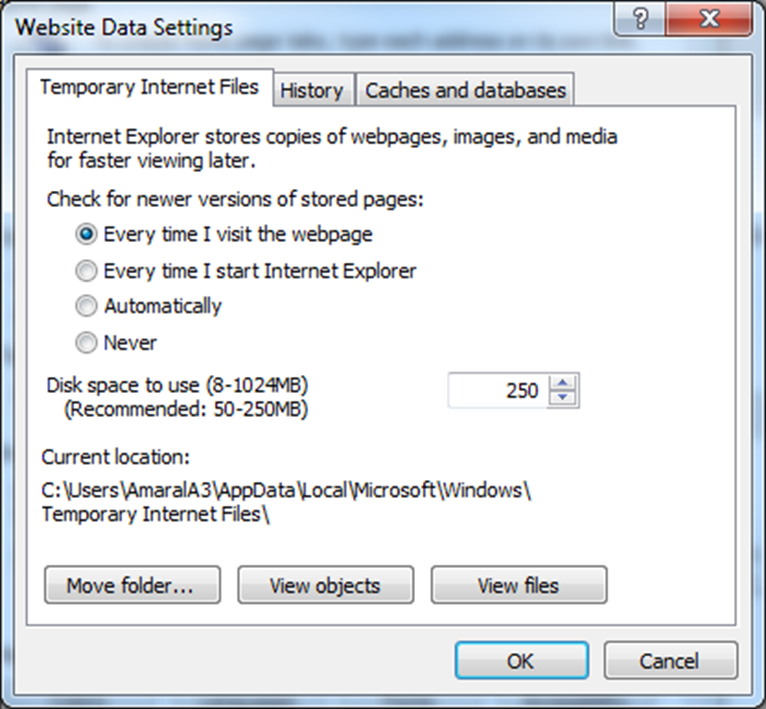
Under the Browsing History section, click on Settings
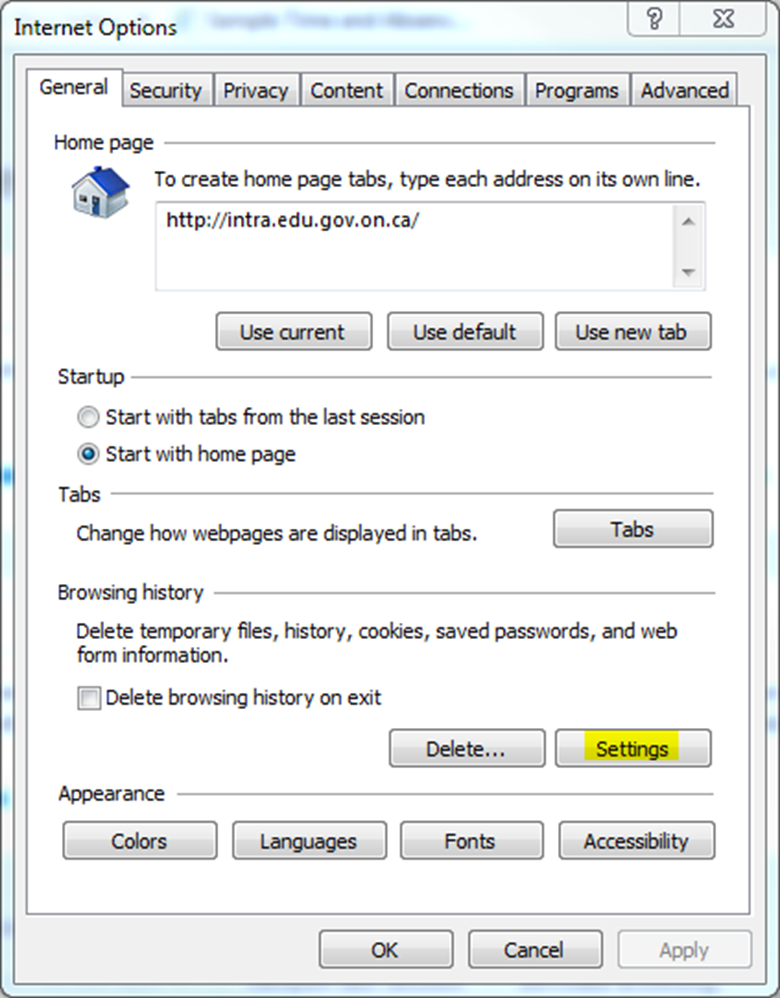
Select Every time I visit the webpage. Click OK -> Apply
Security Settings
Select Trusted sites from Select a zone to view or change security settings section and click on the Sites button.
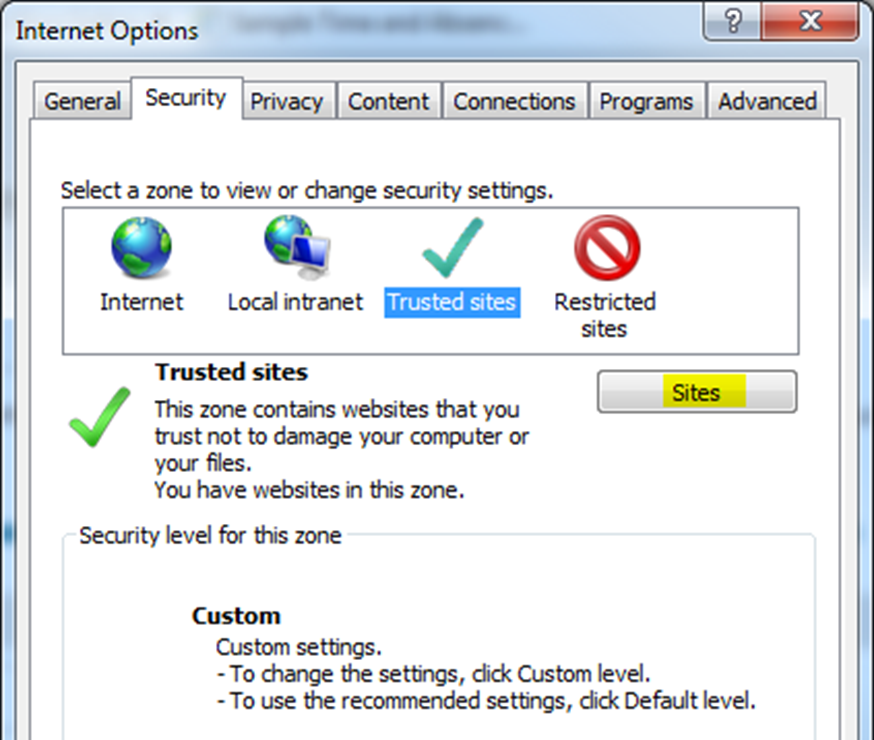
In Add this website to the zone, enter the following URL: https://efis.fma.csc.gov.on.ca
Afterwards, uncheck Require server verification (https:) for all sites in this zone and click Add

Repeat for the following URLS:
- https://www.iam.security.gov.on.ca
- *.gov.on.ca
- http://*.gov.on.ca
- https://*.gov.on.ca
Click Close -> Apply -> Trusted sites -> Custom level...
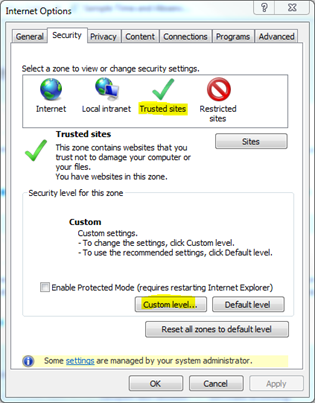
Under Reset custom settings section, next to Reset to:, select Low.
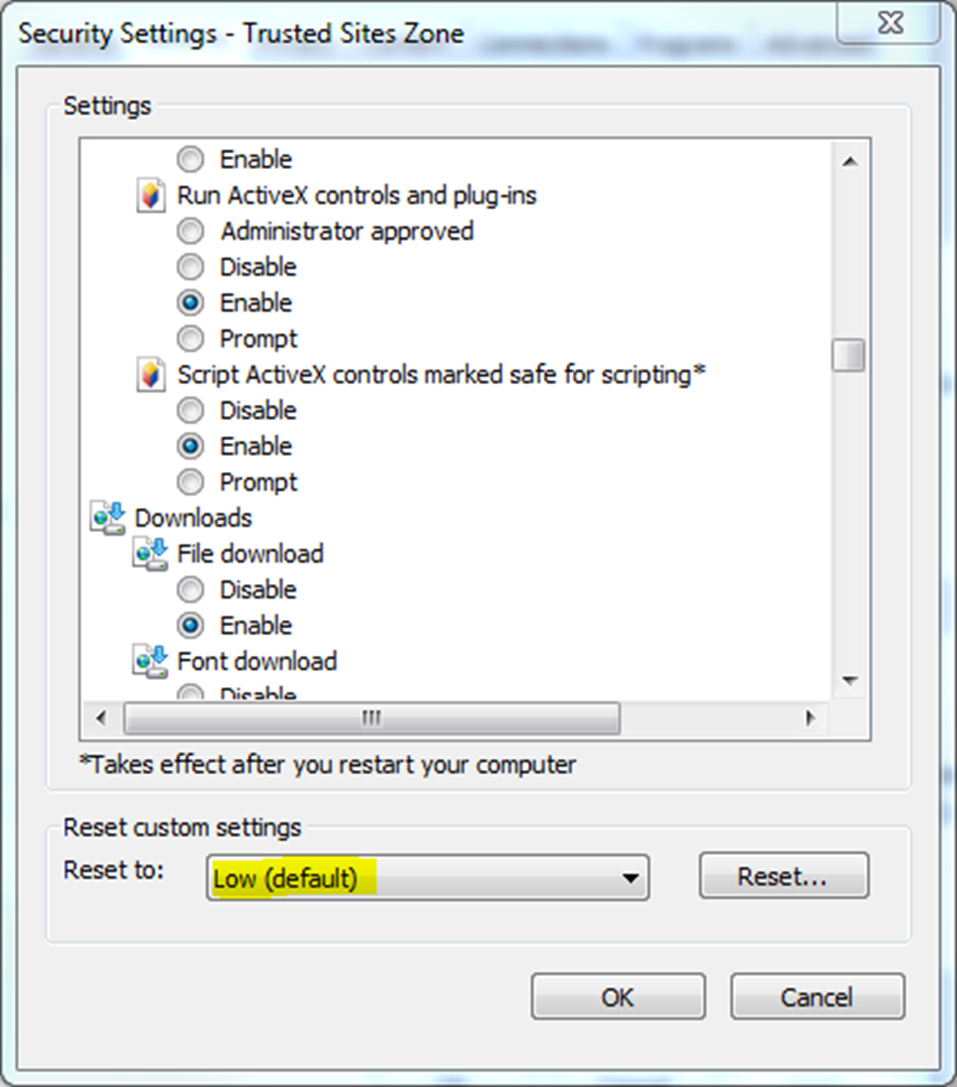
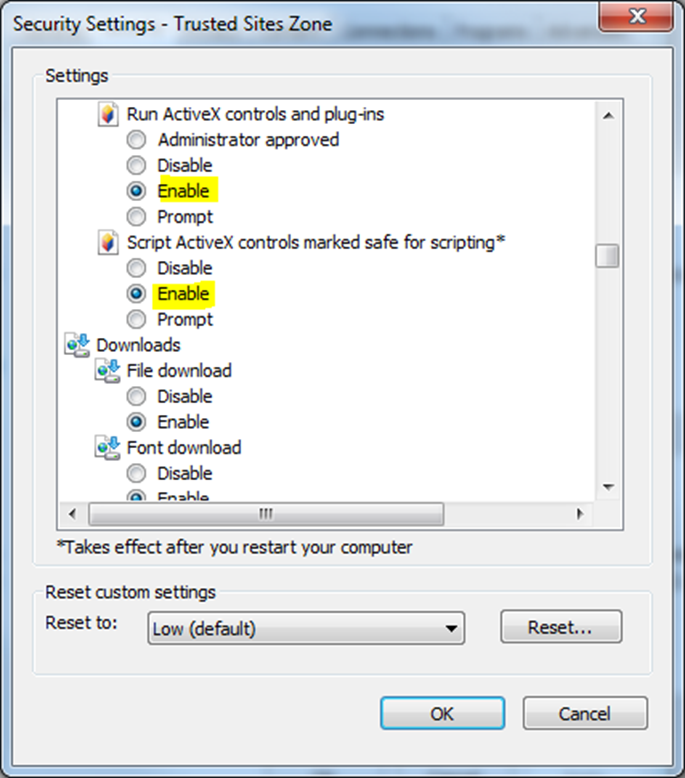
In the Settings section, under ActiveX controls and plug-ins, enable Run ActiveX controls and plug-ins and Script Active X controls marked safe for scripting*
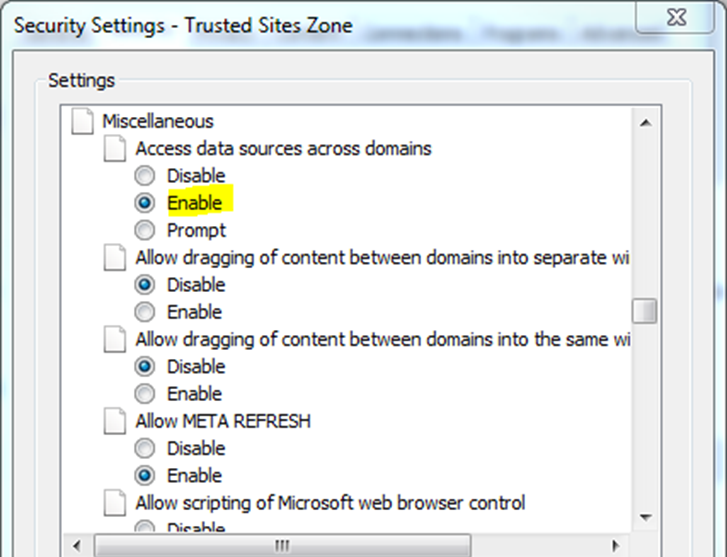
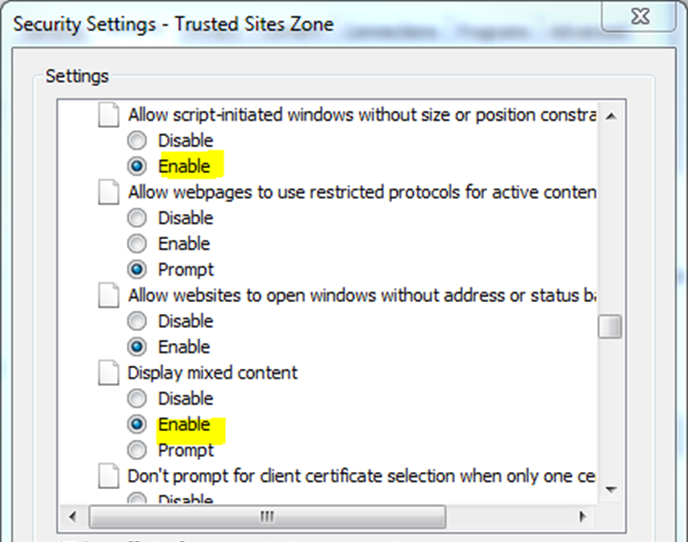
Under Miscellaneous, enable Access data sources across domains, Allow script-initiated windows without size or position constraints, and Display mixed content. Click OK -> Apply afterwards.
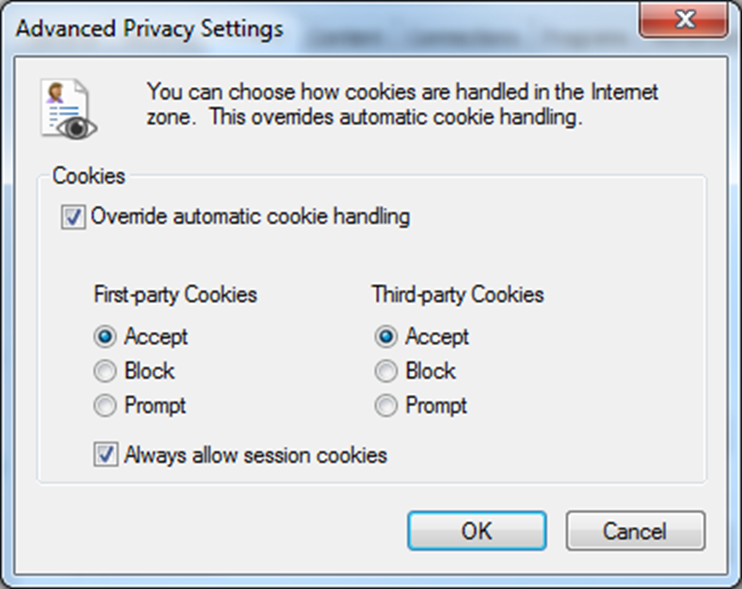
Privacy Settings
Under the Privacy tab, click the Advanced button.
For First-party cookies and Third-party cookies, select Accept
Also check the Allow session cookies option, and click OK.
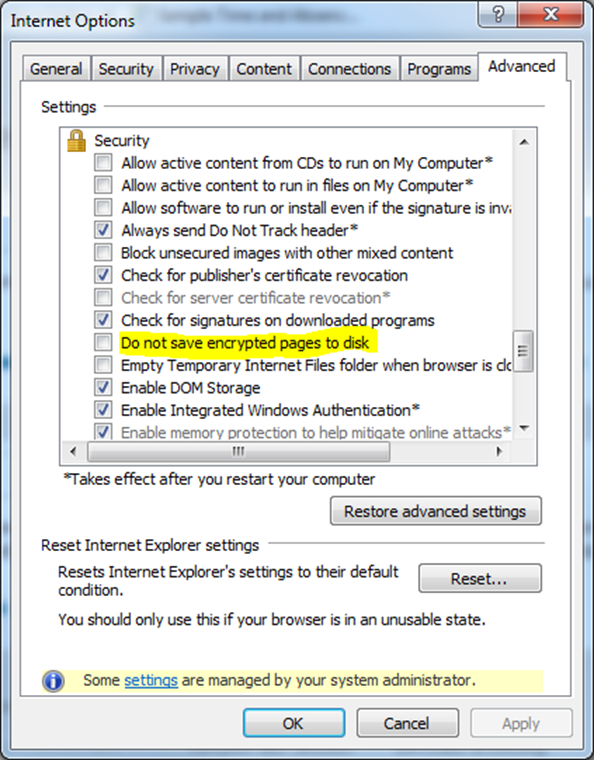
Advanced Settings
Switch to the Advanced tab. In the settings section, under security, uncheck the option Do not save encrypted pages to disk. Click Apply -> OK afterwards.
3.3 Chrome
Recommended Version
The latest version of Chrome is recommended for use with Oracle Hyperion Planning.
The browser can be downloaded from this URL: https://www.google.com/intl/en_ca/chrome/
Chrome Settings
Allow Pop-up Windows
With Chrome open, click on the three dots icon at the top-right of the screen and click Settings.
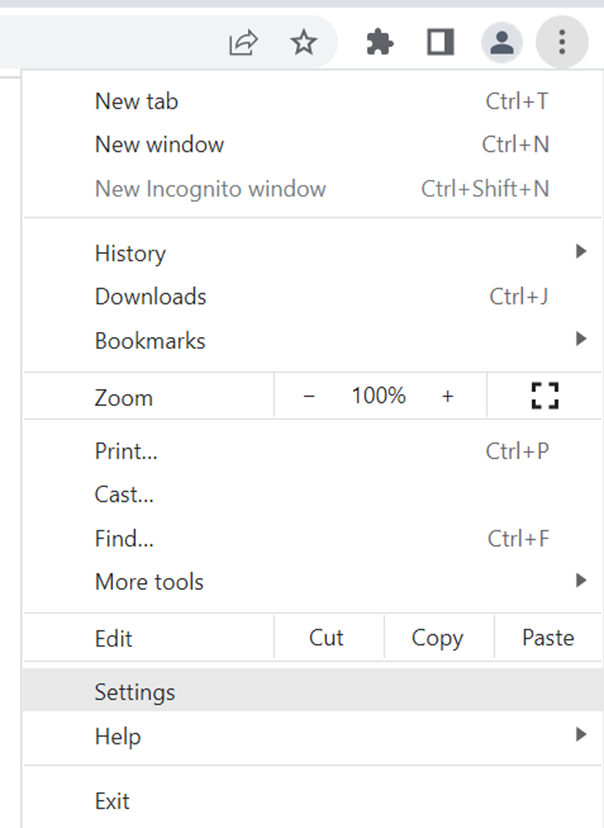
Click on Privacy and security on the left pane and then click on Site settings.
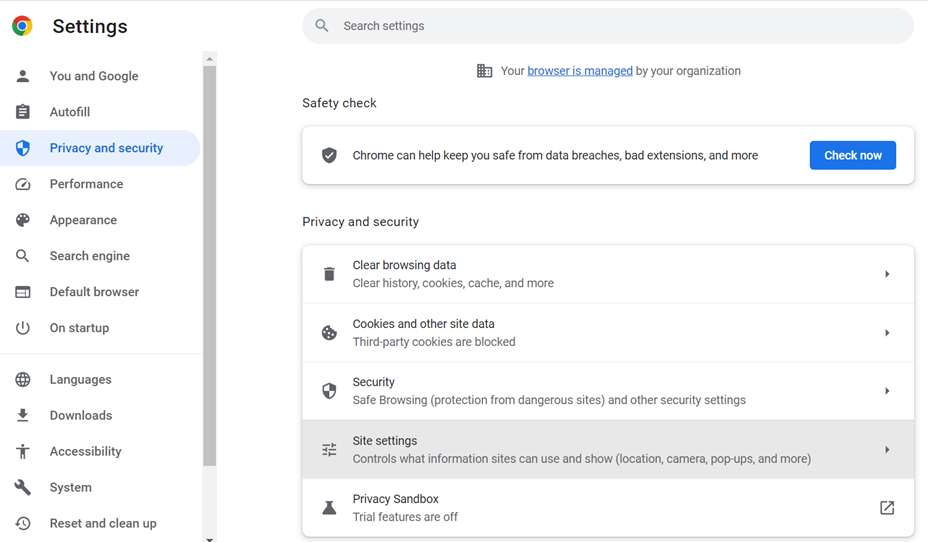
Scroll down and click Pop-ups and redirects.
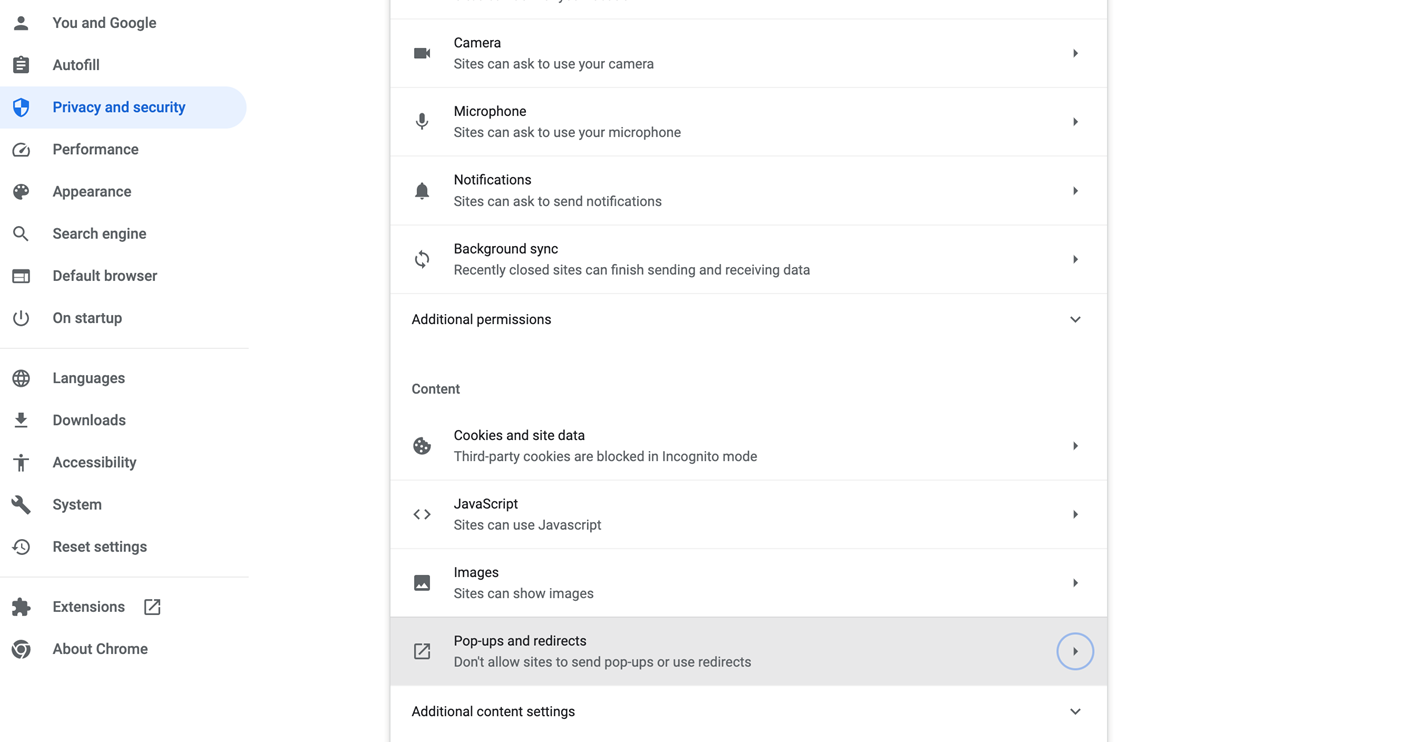
On the Pop-ups and redirects screen, make sure Don't allow sites to send pop-ups or use redirects is marked. Then under the Customized behaviours section, for the Allowed to send pop-ups and use redirects option, click Add.

Type [*.]gov.on.ca and then click Add.
![Entering [*.]gov.on.ca as an exception for popups](img/imgs-en/setup_guide/chorme_popups_3.png)
For more information on popups in Chrome, please visit: https://support.google.com/chrome/answer/95472?hl=en&co=GENIE.Platform%3DDesktop#zippy=
Changelog
| Version | Date | Editor | Description |
|---|---|---|---|
| 1.0 | Nov 27, 2014 | EFIS Team | Initial release |
| 1.1 | Dec 11, 2014 | EFIS Team | Added 'and Training' to URL description “NOTE: For UAT and Training user's only, use this URL:” |
| 1.2 | Dec 17, 2014 | EFIS Team | Removed “NOTE: For UAT and Training user's only, use this URL:” from pages 15, 25 and 34 |
| 1.3 | Feb 11, 2015 | EFIS Team | Removed reference to 'Child Care' / 'Board User' to make a generic Setup Guide |
| 1.5 | Jul 15, 2016 | EFIS Team | Updated System Requirements, Browsers and Smart View Setup |
| 1.6 | Aug 07, 2016 | EFIS Team | Removed reference to Calculation Manager and other updates based on feedback |
| 1.7 | Aug 18, 2016 | EFIS Team | Removed reference to Calculation Manager and other updates based on feedback |
| 1.9 | Aug 22, 2016 | EFIS Team | Fixed the URL for Firefox Portable |
| 1.10 | Oct 19, 2017 | EFIS Team | Updated Section 7.6 |
| 1.11 | Mar 09, 2023 | EFIS Team | Updated System Requirements, Downloading hyperlinks, some images. Added Chrome, IE MS Edge settings, Creating DWORDs. |
| 1.12 | Mar 21, 2025 | Angelie S. | Modified "Contact Us" footnote |
| 1.13 | April 1, 2025 | Angelie S. | Updated Smart View installation steps, added Health Check, removed time out fix. |